

TL;DR: ChromatiX turned the ModRetro Chromatic’s FPGA design into a LiteX
design, so replacing the Game Boy core with a RISC-V SoC is now a build option. --with-doom
builds a VexRiscv with 7.5 MB of the console’s PSRAM as main RAM, a CPU frame buffer that feeds the
existing LCD pipeline, PCM audio and the buttons.
doomgeneric was playable on the console about an hour after
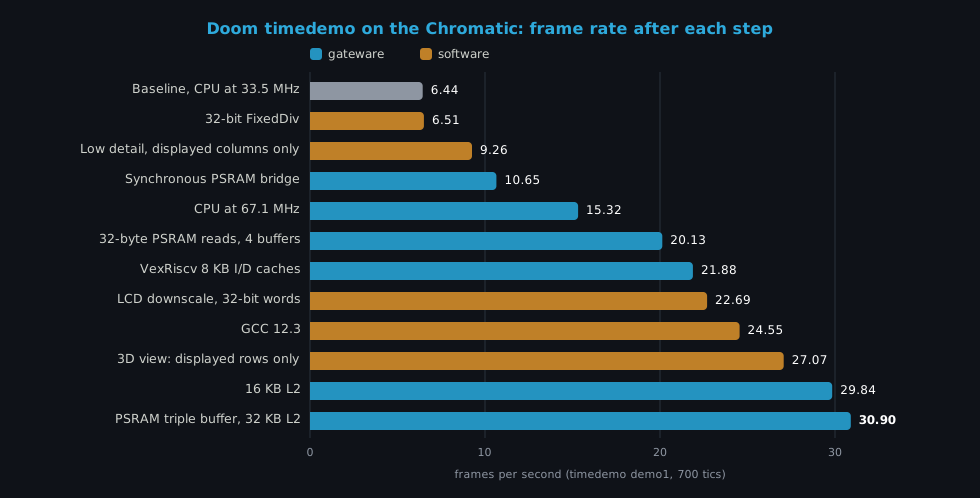
the first commit. The next five hours went into measuring and optimising, from 6.4 fps to
31 fps, tear-free, through a mix of gateware (CPU clock, PSRAM block fetch, caches), compiler
and renderer changes. Everything is on the
doom branch.
Why Doom, and why it was quick#
Doom is the usual stress test for a small system: about 4 MB of WAD data, a 320x200 software renderer, enough memory traffic to show every weakness of a memory system. On the Chromatic it also exercised everything the ChromatiX migration made available: the PSRAM controller, the video pipeline, the audio path, the buttons and a fast USB link to the host.
The port was quick because almost nothing had to be invented. The doom branch was done in one
working day, 31 commits, with an AI agent driving the build/flash/measure loop through the same
debug bridge and UVC capture we used for the migration. Bring-up to a playable game took about an
hour; the rest of the day was optimisation, one measured step at a time.
A different SoC in the same bitstream#
./chromatix.py --with-doom keeps the whole console platform (clocking, PSRAM controller and
arbiter, video pipeline, USB) and replaces the Game Boy core with a LiteX SoC:
- A VexRiscv in the
standardconfiguration (rv32im, single-cycle multiplier), generated with 8 KB instruction and data caches. No FPU: Doom is fixed-point anyway. - No ROM and no on-chip RAM. The CPU starts directly in main RAM and is held in reset while the host loads the firmware and the WAD over USB.
- Main RAM is 7.5 MB of the PSRAM, mapped at 0x40000000, behind an L2 cache.
- A frame buffer the CPU writes in 8-bit indexed colour with a 256-entry palette.
PCMAudio: a 512-sample stereo FIFO played at 11025 Hz, with an interrupt when it falls below half full.- The buttons, through the existing debounced CSR.
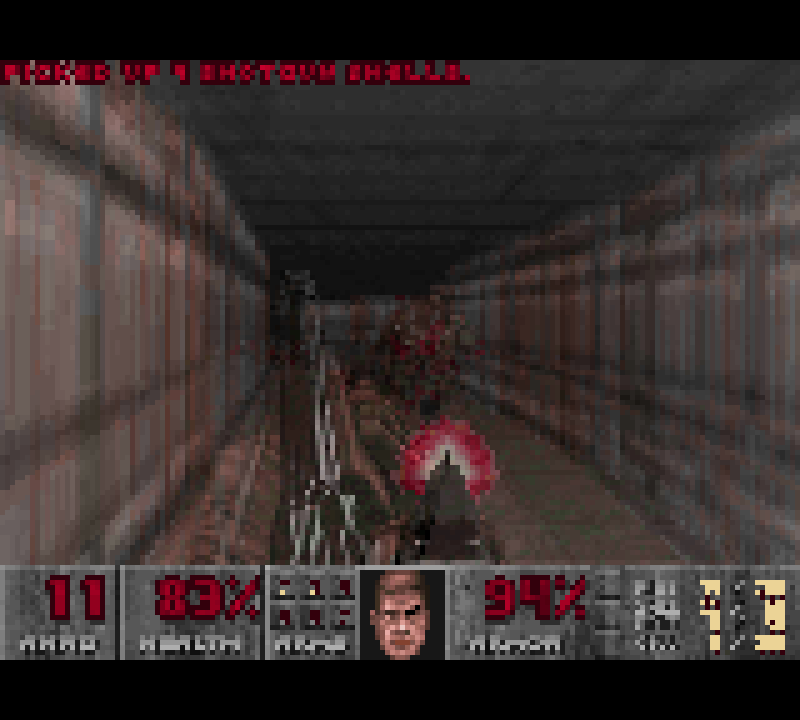
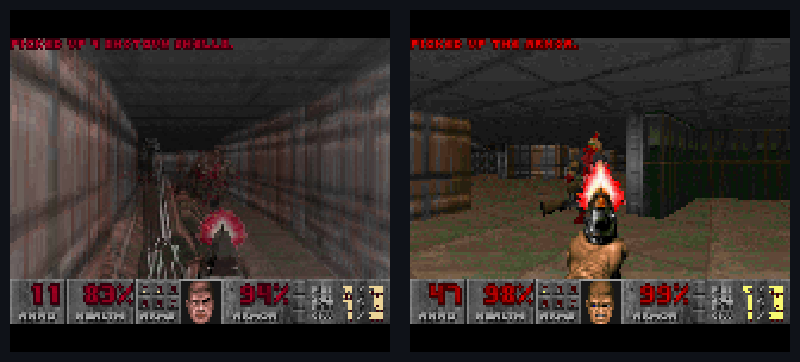
The frame buffer is the piece that saved the most work. Instead of driving the LCD itself, it produces the same LCD-interface signals as the Game Boy core (pixel enable, data, mode, vsync). The rest of the video pipeline does not know the difference, so the ST7785 panel timing, the colour correction, the ESP32 on-screen menu and the 320x288 UVC capture all work unchanged. That is also why every screenshot in this post was taken over USB.
Loading uses the debug bridge. scripts/chromatic.py run doom.bin --wad doom1.wad writes the
firmware at 0x40000000 and the WAD right after the firmware’s stack, checks both with a CRC and
releases the CPU from reset. Before sending the WAD it repacks it so every lump is 4-byte aligned:
RISC-V has no misaligned accesses in hardware, and with aligned lumps the firmware can use them in
place instead of copying them into Doom’s zone heap. Writes over the USB link run at about 2 MB/s,
so the 4 MB shareware WAD is loaded in about 2 seconds.
Fitting 320x200 into 160x144#
Doom renders 320x200, and the Chromatic LCD is 160x144. We show every other column (160) and 120 rows, which keeps Doom’s 4:3 aspect ratio and leaves the image letterboxed in the 144-line screen. The full height or 100 lines can be selected at build time.
Once the LCD only shows half the columns, there is no reason to render the other half. Doom’s
low-detail mode already draws columns in pairs; we forced it and made the column and span drawers
write only the displayed columns. We did the same for rows later on: ROW_SKIP draws only the 120
displayed rows of the 3D view, with the skipped rows filled before screen wipes, and the spectre
“fuzz” effect sampling from neighbouring displayed rows so it still looks right.
The doomgeneric changes are small and all behind #ifdefs: direct frame and palette access, WADs
from memory, no SDL mixer, the 32-bit FixedDiv, the low-detail and row-skip renderers and a
timedemo hook. About 185 lines. The platform layer is split between hal_litex.c for the SoC and
hal_sdl.c for a PC build that emulates the Chromatic in a 160x144 SDL window, so most of the
porting work could be checked on the PC before touching hardware. The same firmware also runs in
litex_sim with the WAD preloaded, which is slow (about ten minutes to frame 60) but proves the SoC
firmware without the console.
Measure first#
The first build on hardware ran at about 4 fps in play (6.4 fps on the timedemo below). Before changing anything we added the tools to see where the time went:
MemoryCounters, a small gateware block counting main RAM accesses, PSRAM requests, PSRAM busy cycles and the longest request.- A 1 kHz timer interrupt that samples the CPU’s program counter into a histogram in main RAM, which the host maps back to firmware functions.
- A timedemo hook and a host block in RAM for arguments and results, so
chromatic.py doom-benchloads the game, runs the first 700 game tics ofdemo1and reads back the frame rate, the counters and the profile, all without a console UART.
./scripts/chromatic.py --serial /dev/ttyACM0 doom-bench firmware/doom/doom.bin --wad doom1.wad --profileThe first profile was clear. The PSRAM was busy 46% of the cycles at 18.3 cycles per request, and the Game Boy frame-blend logic was still reading the PSRAM in the background. The column and span drawers were the largest CPU cost, followed by the wall setup and the LCD copy.
The optimisation ladder#
Every step below was measured with the same timedemo. Each one is a separate commit on the branch.
| Step | fps | What changed |
|---|---|---|
| Baseline (CPU at 33.5 MHz) | 6.44 | PSRAM busy 46%, 18.3 cycles per request |
32-bit FixedDiv | 6.51 | bit-exact, no 64-bit software division |
| Low detail, displayed columns only | 9.26 | the drawers write half the columns |
| Synchronous PSRAM bridge, no frame blend | 10.65 | 13.9 cycles per request, worst case 306 → 115 |
| CPU at 67.1 MHz | 15.32 | CPU in the PSRAM controller’s clock domain |
| 32-byte PSRAM reads, 4 block buffers | 20.13 | PSRAM requests 69.5M → 30.6M per run |
| VexRiscv with 8 KB I/D caches | 21.88 | generated variant, up from 4 KB |
| LCD downscale with 32-bit words | 22.69 | |
| GCC 12.3 instead of 10.1 | 24.55 | same code, LTO |
| 3D view: displayed rows only | 27.07 | 120 of 200 rows drawn |
| 16 KB L2 | 29.84 | no extra data BSRAM, see below |
| LCD frame buffers in PSRAM, 32 KB L2 | 30.90 | triple buffered, tear-free |
A few of these deserve a word.
The synchronous bridge removed clock-domain-crossing synchronizers between the Wishbone bus and the PSRAM controller. Both clocks come from the same PLL, so the request/acknowledge toggles do not need them, and each access saved several cycles. Disabling the Game Boy frame blend in CPU builds removed traffic nobody was looking at.
Moving the CPU to 67.1 MHz was the biggest single gain. The PLL already produced a 67.11 MHz clock (xClk) for the PSRAM controller, and we let the CRG use it as the system clock. The CPU and the PSRAM controller now share one clock, timing was met at the time with a 72.5 MHz Fmax, and the frame rate went up by almost half.
Block fetch changed the access pattern: the PSRAM bridge reads 32 bytes per request instead of 8 and keeps four of those blocks in round-robin buffers. Code fetches, texture reads and frame buffer accesses are mostly sequential, so neighbouring cache-line misses often land in an already-fetched block. The number of PSRAM requests per benchmark run fell by more than half.
The last step moved the LCD frame buffers out of block RAM. The first frame buffer held the
160x144 indexed image and its palette in 12 BSRAM blocks. The final LCDPSRAMFramebuffer keeps
three RGB555 frame buffers in PSRAM instead: the CPU writes 8-bit indexed lines into four small line
buffers, and the hardware converts them through the palette and writes them to the back buffer in
bursts. The front buffer switches at vsync, so there is no tearing and the CPU never waits for the
display. The 12 freed BSRAM went straight into the L2, which went from 16 to 32 KB.
Two things we tried and left out: -O3 (8.80 fps) and -Os (8.93) were both slower than -O2
(9.26) at the time, with 4 KB instruction caches. And the framebuffer stores themselves turned out to
cost only about 10%, so a faster LCD path alone would not have helped much.
Living at 56/56 BSRAM#
The GW5A-25 has 56 BSRAM blocks, and the final build uses all 56, with 68% of the logic. Most of the later steps were trades inside that budget.
The first build had no on-chip RAM at all, precisely to leave BSRAM for the frame buffer and the caches. The 8 KB VexRiscv caches took the count to 55. The L2 then turned out to have a convenient property: LiteX’s Wishbone cache stores its data with one BSRAM per byte lane, so growing it from 8 KB to 16 KB fills blocks that were already allocated and costs no extra data BSRAM. Growing it to 32 KB needed real blocks, which is what moving the frame buffers to PSRAM paid for.
Timing is tight too. Fmax went from 72.5 MHz down to about 67.4 MHz as the caches and buffers grew, just above the 67.1 MHz target. A coding-style cleanup pass at the end of the day changed no behaviour: the 137 unit tests pass and the timedemo stays at 30.86 fps.
Known issues#
The USB link has a rare read stall: about once per 100 KB, reply bytes from the UARTBone bridge are
held until the next request. It is in the LUNA bulk IN path, and the root cause is not found yet.
chromatic.py --serial talks to the bridge directly and resynchronizes and retries, which makes it
a non-issue for loading and benchmarking; writes are reliable. The first benchmark after a flash is
about 5% slower than the following ones, which we have not investigated. There is no music (no
MUS/OPL synthesis), only the sound effects, mixed on 8 channels in the audio interrupt. With
everything at 56/56 BSRAM and 67 MHz barely met, the next gains will come from the drawers and the
LCD copy, which now dominate with the PSRAM busy about 33% of the time.
Try it#
You need the Gowin toolchain for the bitstream, a RISC-V GCC (GCC 12 is faster), and the shareware
doom1.wad, which is freely distributable but not included.
git clone --recursive -b doom https://github.com/enjoy-digital/chromatix
cd chromatix
export LITEX_ENV_CC_TRIPLE=riscv-none-elf   # Optional: xPack GCC 12, faster firmware.
./chromatix.py --gowin-path ~/tools/gowin_1.9.12.04/IDE --with-doom --build --flash
make -C firmware/doom

litex_server --uart --uart-port /dev/ttyACM0 &
./scripts/chromatic.py run firmware/doom/doom.bin --wad doom1.wad
litex_term crossover                         # Doom's console output.
Controls: the D-pad moves and turns, A fires, B opens doors, Start opens the menu. Select alone opens the automap, Select with Left/Right strafes and Select with Up/Down changes weapon. The Menu button stays with the ESP32.
To work on the port without the console, the PC build uses the same platform code:
make -C firmware/doom -f Makefile.host
DOOM_WAD=doom1.wad firmware/doom/doom_host
The full details, including the litex_sim recipe, are in
doc/DOOM.md. The application
SoC built here (67 MHz CPU, PSRAM bridge, frame buffer, PCM audio) is also the base of the
ChromatiX SDR.
Doom by id Software, via Chocolate Doom and doomgeneric (GPL-2.0). Sylvain Munaut’s doom_riscv showed years ago that Doom on a small rv32im FPGA SoC with PSRAM is very much possible; this port takes a different route (doomgeneric, LiteX SoC). Built on LiteX and VexRiscv.
Work and ideas by Enjoy-Digital; written up with AI in the loop.